
Hi everyone!
Crafting is so fun and such a creative outlet. But sometimes I get a request that is SO FAR out of my comfort zone. Last week one of my husband's friends asked if I could make a Zombie Anniversary card for him to give to his wife. Yikes! First....of course I needed to come up with a zombie digi for the card. And second....how in the world do I make a zombie anniversary card? I think of anniversary cards as having lace and hearts and flowers. Well, I was determined not to let this challenge get the best of me. And I really ended up very pleased with both the Zombie Love digi and the card that I made to help them celebrate their anniversary.


I thought the paint and salt technique was the perfect addition to give a background to the Zombie Love digi. I hope you enjoy learning this technique.
First, let's gather just a few supplies. I like keeping a water spray bottle at my craft desk so that is what I am using here. Of course a little cup of water will work fine too. I am using black acrylic paint for my project. This technique also works for watercolor paints and even Sparkling H2O's. Really any water based paint will probably work. And I am using the Zombie Love digi printed on high quality paper. I would recommend testing on a small piece of paper to see if you get the result that you like. There are lots of good quality papers available and water color paper would be another great choice. Last but not least...head to the kitchen and grab your handy salt shaker.

To start wet the paper. You don't want it to be sopping wet but just evenly brush water over the paper. I am being careful not to extend the water into the actual image space.

Now mix the paint with quite a bit of water. Remember...you can always make the background darker, but it is harder to make it lighter. In this step getting the paper wet enough is very important. After a little experimenting I found that it was best to do the whole area around my digi at once. It was too difficult to match the color when I tried painting, salting, and drying sections.

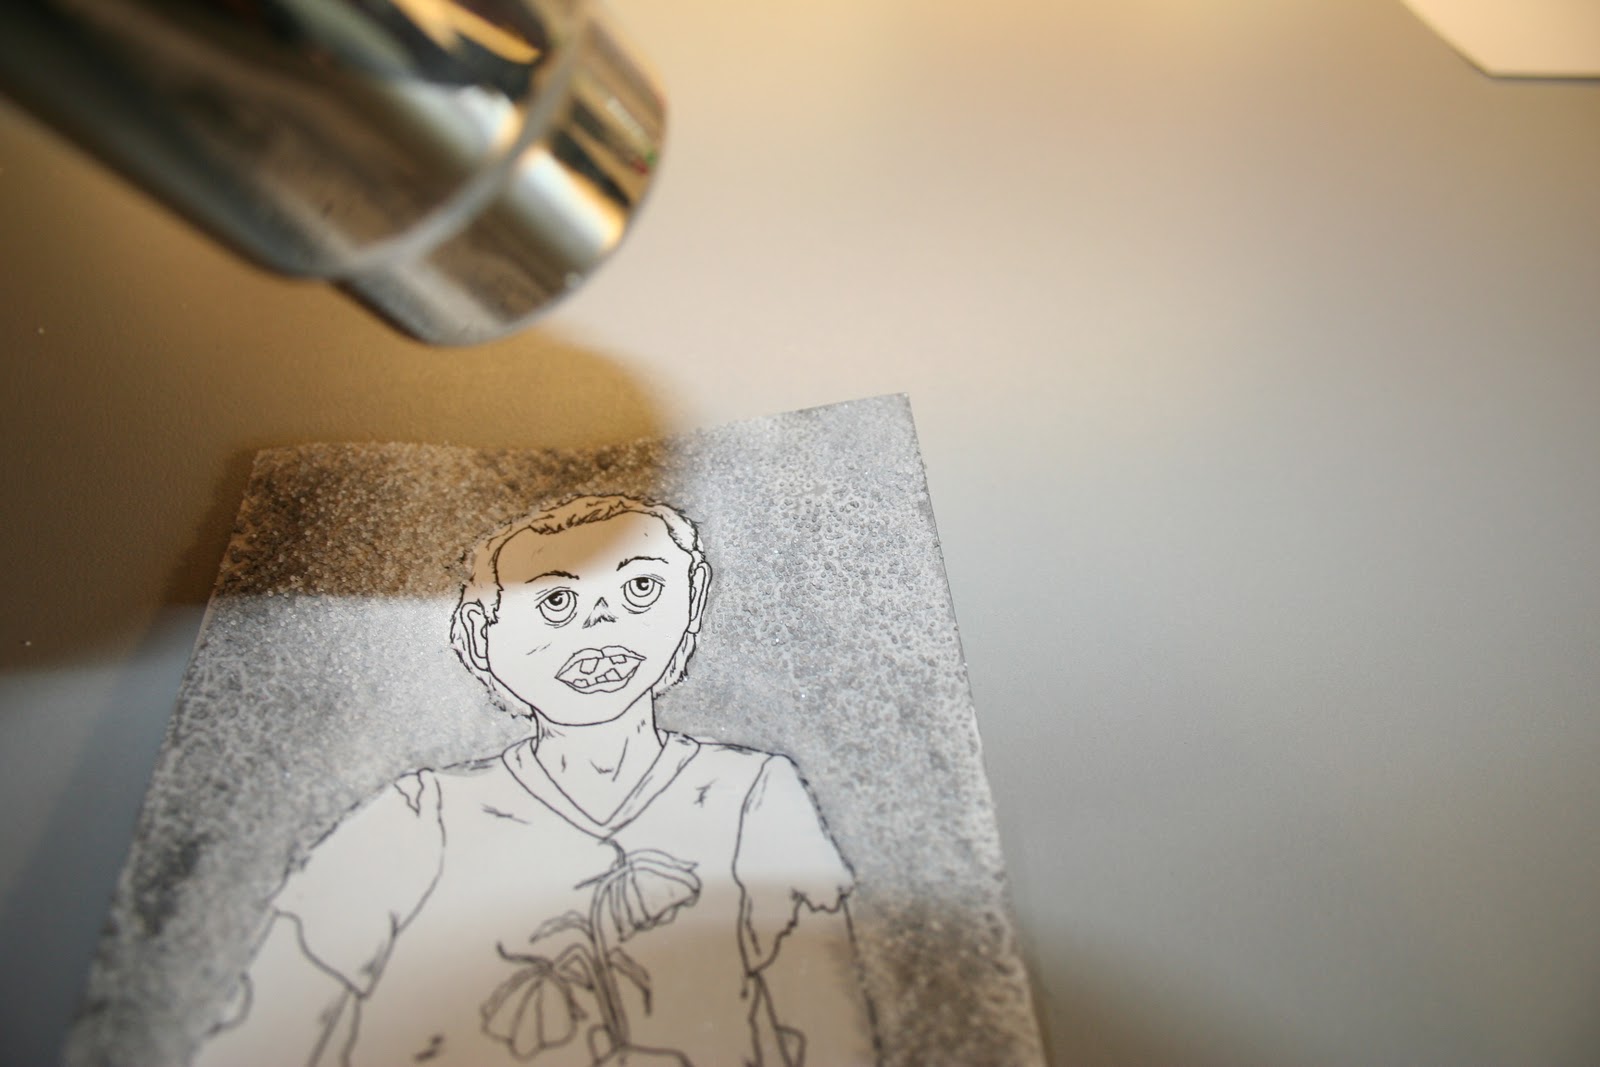
Once the entire area is covered with paint and is nicely wet you can begin adding salt to the surface of the paint. BEWARE! I am still finding salt in my studio. It might be nice to do this step over a cake pan or plastic dish to catch all of that extra salt.

This picture shows the salt over the entire background.

Now use your heat embossing tool to dry your paper. Be careful, you don't want to burn or brown the salt here. We are just trying to dry the paint and paper. As the paper dries you will begin to really see the cool background that you have created.
Once the paper and paint are dry use your fingers to completely remove the salt from the surface of the paper. Just wipe across the salt to rub it off. Caution is advised here too. This is another place where the salt seems to take over your craft space. :)

Here is my finished background and colored image.

Awesome tutorial, Shelly! Thank you!
ReplyDeleteWay cool tutorial! hoping I can give this a try very soon! =)
ReplyDelete