I hope everyone is ready to try a new technique today. Several weeks ago a friend brought a card over and showed me this wonderful technique with dry embossing.
Supplies Needed: card front, desired shapes, embossing folder, embosser and desired embellishments
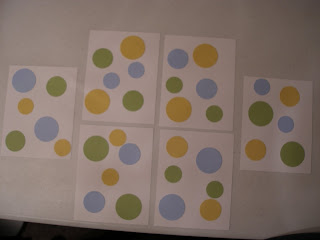
I started out by cutting out several card fronts and using my circle punches in several sizes for my shapes.
Simply glue down your desired shape to the card front. I did several at once to make multiple cards.
Dry emboss the card front with the embossing folder of your choice.
I added some ribbon, sentiment and of course the darling "Duckling" image to finish off this simple card.
I hope you enjoy this technique. Please stop by and share your new projects. Don't forget there is still time to enter our current challenge.


This is a very good tutorial. Thank you for sharing. I can't wait to use this technique.
ReplyDeletereally a clever idea! This would be a great way to use some of those little scraps building up on my desk..lol thank you :)
ReplyDeleteLOVE this Stephanie! What a great tutorial.
ReplyDeleteOoohw I wondered how you did it, and now I know, wonderfull tutorial, thanks Stephanie!
ReplyDeleteGreat job Stephanie! Can't wait to try this out!
ReplyDeletelove the idea of adding the circles BEFORE embossing! gonna try this idea sometime! :) great looking card! :)
ReplyDeleteFabulous tutorial, Stephanie! Very nice effect!
ReplyDeleteOh what a great idea for embossing, I never thought of adding layers and then embossing the whole piece. Thanks Stephanie!
ReplyDelete♥ Sandi