Showing posts with label Fabulous Freebie Friday. Show all posts

Friday, February 10, 2012

Fabulous Freebie Friday

Hi everyone!

Whew...seems like life has been so crazy lately.  I have been so busy creating new images that I haven't had much time for creating freebies.

This week I thought I would offer you a fun Valentine's Day sentiment.  I am making some projects that required a less "elegant" Valentine sentiment.  And I thought many of you might be doing the same types of projects.

Sorry...our freebie event has expired

This freebie will be available from now through Monday.  After that it will travel to our store.

Please remember...
  • Sharing freebies isn't allowed.  Please send your friends in to get their own copy.
  • Please leave us a little comment if you enjoy our freebie.  Hearing from you might get me inspired to make more freebies for coming Fridays.  :)

Friday, December 9, 2011

On the 9th Day of Christmas.....A Fabulous Freebie Friday!


Wow...two freebie days in a row!
Sorry....our freebie event has expired.

Please enjoy our Snow Cloud Freebie.
  • Please don't share our freebies.  
  • This freebie will be available from now through Sunday.
  • Leave us a little note if you dropped in to enjoy our freebie today.


Friday, December 2, 2011

On the 2nd Day of Christmas


Shelly's Images gave to me........a wonderful "Snow Sign" freebie.
Sorry....our freebie event has expired.  "Snow Sign" will be available at our store soon.

You may have seen this image on a few of the DT projects.  Darlene was also kind enough to make a special project to inspire you a little more.

Darlene's project shows a cute sentiment added to the image.  There are so many possibilities. And don't forget that this image fits perfectly with our "There's no business like SNOW business" challenge this week.
Oops....I was supposed to offer that cute sentiment too.  Thanks for reminding me Darlene.  Thank goodness we were Skyping this morning.  :)

Please remember....
  • Sharing freebies is not allowed.  
  • Leave us a comment if you dropped in to get our freebie today.  We love hearing from you.
  • The freebie will be available from now through Sunday.

Friday, November 25, 2011

Fabulous Freebie Friday

Now that Thanksgiving is over it is time to get in the full swing of preparations for Christmas.  

Our challenge and freebie this week are both aimed at getting you all inspired to do your Christmas projects.  

Our Freebie event has expired.  Please check back next Friday.


Darlene was sweet enough to make us a little card to show off this cute image.

Please remember....
  • Sharing freebies is not allowed.  Just send all of your friends in to get a copy of this special digi stamp.
  • Please leave a little note for us if you enjoyed this freebie.  It takes hours to create these digi stamps and we love getting a little note from you if you like the freebie.
  • The freebie will be available from now through Sunday.  After that you will be able to find this image in our store.


Friday, November 18, 2011

Fabulous Freebie Friday

Hi everyone!

I hope you have had a great week.  I know that it has been soooo busy here.  

Today we have a simple Christmas sentiment for you.  

  • Remember that sharing freebies is not allowed.  
  • Please leave us a little comment if you stopped in today and enjoyed our freebie.  We love hearing from you.
  • This freebie will be available now through Sunday.
Have a great weekend....and...


Friday, November 11, 2011

Fabulous Freebie Friday

Happy Friday!  And happy 11/11/11.  That will be a fun date to write today.
Sorry....our freebie event has expired.  Our "Jingle Bells" image will be available at the store later today.


Please remember...
  • Sharing freebies isn't allowed.  Please send your crafty friends in to get a copy of this freebie.
  • Please leave us a little message if you enjoy the freebie.  It takes hours to create these images to share with you and we love hearing from everyone who comes in to get the freebie.
  • This freebie will be available from now through Sunday.  After that you can find this beautiful image at our shop. 


Friday, November 4, 2011

Fabulous Freebie Friday

Happy Friday!

Today for Fabulous Freebie Friday we are offering a wonderful sentiment that is perfect for some of the Thanksgiving projects that many of us will be working on.

Please leave us a comment to let us know that you dropped in today.  We really love hearing from you. 
And please remember that sharing our freebies is not allowed.  Just let all of your friends know that they should drop in to get a copy and become a follower.  We have an amazing digi freebie next week that no one will want to miss.  :)


Friday, October 28, 2011

Fabulous Freebie Friday

Happy Friday everyone!

Are you enjoying our Freebie Friday events?  We hope to be seeing lots of our freebie images showing up for our challenges.  We can't wait to see what you create.

Sorry....our freebie event has expired.  Full Moon Flight will be available at the SI Shop soon.

Darlene is once again sharing a beautiful project with us for this week's Fabulous Freebie Friday event.  I can't thank Darlene enough for always going above and beyond the call of duty.  And for being such a great friend.

Remember, the freebie is only available from now through Sunday.  Sharing our freebies is not permitted, but we would love it if you would send all of your crafty friends in to become a follower and enjoy our freebie.  

And leave us a little note to let us know you enjoyed the freebie.  We love hearing from you.


Tuesday, October 25, 2011

Technique Tuesday - Tips for mass producing projects.

Over the summer a friend of mine asked me to make 125 wedding invitations for her.....on a BUDGET!

If you know me at all then you know I am a pretty frugal crafter.  So the challenge of making 125 invitations at a low, low price was right up my alley.  I thought I would share a few tips and tricks that I used to create beautiful invitations on a very tight budget.  Whether you are making a large quantity of invitations, bulk cards for groups like "Cards for Soldiers", or your yearly Christmas cards, I hope you find these 8 tips very useful.


  •  Tip #1 - Choose your envelopes first.  For this project and likely for most projects the envelopes were going to be the most expensive component.  And once the envelopes are chosen it is easier to size and plan your project.
  • Tip #2 - Make a prototype (shown below). Even if all of the elements aren't exactly the right color the prototype will help you get the perfect sizes and help you plan on how much paper, ribbon, vellum, and other supplies you need to purchase. I generally write sizes and instructions on my prototype.  A prototype will help you work out all the kinks so your final project will be perfect.  I also take the prototype with me when shopping for other supplies.  And....all of my prototypes are kept in a file in my studio.  So later I can refer to it for a different project and not need to completely reinvent the wheel. :)

  • Tip #3 - Make a cheat sheet.  I know...mine looks like a bunch of chicken scratches.  :)  List each supply and make a calculation of how much you will need to finish the number of cards or invitations that you are making.  My cheat sheet showed the measurement of the envelopes that I chose and how many packages I would need to order.  I multiplied the number of inches of ribbon I needed for each invitation by the number of invitations I was making to figure out how many spools of ribbon to purchase.  And I figured out how many sheets of paper I would need by determining how many parts I could get from each sheet of paper.  This is SO helpful because I always purchase more than I need if I don't take the time to plan.  Purchasing exactly what I needed was a big budget saver.

  • Tip #4 - Make a cutting "map" for each paper component of your project.  Making this map will insure that you get the most from each sheet of paper that you purchase.  The map helps to determine how many sheets that you will need to purchase and it is a great reference to look at when you are actually cutting all the parts for your project.  I am a very visual person so I mapped my cuts on typing paper.  (using 12 x 12 paper? Just tape typing paper together to achieve the right size...then make your map)   As you can see from my vellum "map" it is sometimes helpful to turn the direction of some pieces to fit more on the page.  I made little notes so I knew the exact measurement of each cut to make on my paper cutter.


  •  Tip #5 - Make your own embellishments.  Embellishments are so expensive!  It would have cost a ton to purchase beautiful ribbon sliders for each card.  So I made my own and cut them out.  Was it alot of cutting?  Yes...but it is kind of mindless.  It is definitely something that you can do in front of the TV while watching "Last Man Standing" on Tuesday nights.  (one of my new favorite shows!)  I drew the image that I wanted to use for my slider.  Then I laid the ribbon over the image to get a feel for where I wanted the cuts to be.  I wanted the cuts to be a little narrower than the ribbon so that the ribbon would bunch together at the slider.  I used Glossy Accents and glass beads to add sparkle to the image.  *Bonus Tip* for my project I found it easiest to thread the ribbon through the slider, then do the glossy accents, and then sprinkle on the beads.*  I am including the heart image that I made for these invitations.  Please enjoy this little freebie.  :)

  •  Tip #6 - Use hot glue when possible.  I know, I know....hot glue isn't exactly archival.  But it is CHEAP.  And it is fast....and it holds like crazy.  Offer to make archival versions of  the invitation for the bride, her parents, and her new in-laws.  The picture below shows the back of the ribbon slider.  The hot glue held the ribbon edges perfectly.  And I didn't need to have alot of ribbon overlap on the back of the project.


  •  Tip #7 - Do everything in sets of 10.  I cut all of the paper layers, ribbon pieces, slider cutouts, and did all of my printing in groupings of 10.  It is so much easier to be organized and to keep count of the project when working this way.  


  • Tip #8 - Budget paper planning.  This might represent the largest challenge for me during this project.  Initially when I started planning these invitations I planned to have the base layer of the invitation measure 5" x 7" and then the printed portion of the invitation to measure 4 3/4 x 6 3/4.  However, by printing the wording of the invitation on the base layer and printing the heart slider on a smaller piece of paper to the left I was able to use about 50% less paper on that 2nd paper layer of the invitation.  Pretty cool!  The printed layer with the heart slider still allowed the ribbon to be wrapped around to hide the ugly edges.  But one minor problem (ok...kind of major problem).  I had to find a way to back the brads so the legs of the brads didn't show on the back of the invitation.  I liked the movement of the vellum and really wanted to attach the vellum with the brad.  But I hate having things show on the backs of my projects.  The solution?  I used a little photo corner punch with a small hole punched in it for the brad.  Now the legs of the brad are hidden behind the photo corner punch, and it looks like a decorative element under the vellum, aaaand I still have the movement of the vellum that I was hoping for.  Oh...and I used hot glue on the back of the corner punch to attach the whole thing to the base of the invitation.  *Bonus Tip*  Save paper by making a flat "postcard style" invitation.  A traditional folded card would have used much more paper than this flat invitation style.


Friday, October 21, 2011

Fabulous Freebie Friday

Are all of your little monsters ready for Halloween?  

I think this will be the first year in our house that we won't have anyone dressing up for Halloween.  It is sad to see that era come to an end, but also exciting to not have to stress over what the coolest Halloween costume would be.

Sorry....our Fabulous Freebie Friday event has expired.

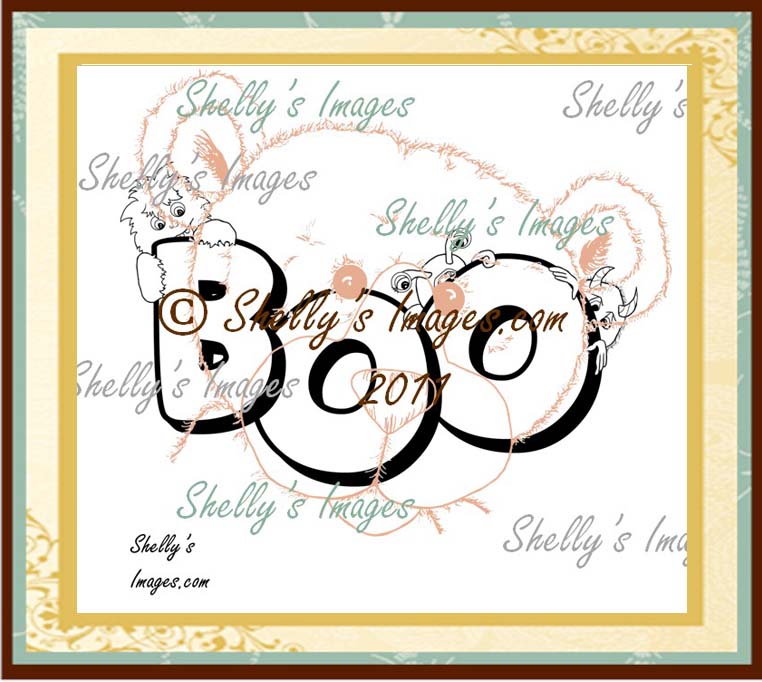
Darlene made this adorable project with our "Boo Monsters" digi.


Please remember that sharing freebies is not allowed.  And leave us a little note if you enjoyed our freebie today.  The more comments we get the more inspiration I have to create freebies.  :) 

This freebie will be available from now through Sunday.  On Monday the image will travel to our store.


Friday, October 14, 2011

Fabulous Freebie Friday!

TGIF!

And welcome to another Fabulous Freebie Friday here at Shelly's Images.

I am so excited to bring this special freebie to you today.  Not sure how things are in your yard, but the leaves are sure flying around in my yard.  And of course that means a huge mess of leaves and alot of work!  It is definitely time to get that rake out.

Unfortunately our Freebie Event has expired.

Please enjoy our "Fall Fence" freebie.
A few of the DT cards for our challenge this week used this image.  Darlene made a special additional project to inspire you even more.  

Remember, sharing freebies is not allowed.  However, we would love to have you send all of your crafty friends in to get their own copy of "Fall Fence".  
And please leave us a little note to let us know that you enjoyed the freebies.  The notes from our friends really inspire me to create more freebies.

Fall Fence will be available from now through Sunday.  Then it will travel to our shop.


Friday, October 7, 2011

Fabulous Freebie Friday

I hope everyone had a great week!

This week for our Fabulous Freebie Friday we would like to share our "Spoon" digi.  This image goes perfectly with our "Mug Set" that we featured this week.
Sorry....our freebie event has expired.  Check back this Friday for a new Fabulous Freebie Friday.
Please remember that sharing freebies is not allowed.  But spread the news and send all of your crafty friends in to get their freebie.  This freebie will be available now through Sunday.  

If you like our freebie please leave us a little note.  We love hearing from you.


Friday, September 30, 2011

Fabulous Freebie Friday!

I have been working hard this week to get lots of freebies ready for our upcoming Fabulous Freebie Friday's here at Shelly's Images.  And we have some really fun digi freebies coming in the next few weeks.

Today I have a wonderful circle sentiment that is perfect to use with this week's Featured Image "Diamond Ring".  Now is the perfect time to get your copy of "Diamond Ring" because it is available at a discounted price today at the store.
Sorry....our freebie event has expired.  Check back next Friday for another freebie.
 For this example I added a monogram letter to the sentiment to personalize it.  What a great sentiment for the front of a wedding or anniversary card.  Of course a wedding date could be added.  So many possibilities!
  • Please remember that sharing freebies is not allowed.
  • If you have questions about how to add a monogram or date to your sentiment post a comment or email Shelly at shelly@shellysimages.com
  • As always, please leave us a little note if you enjoyed our freebie.  We love hearing from you!

Thursday, September 29, 2011

Pssst....Tomorrow is Fabulous Freebie Friday


Be sure to drop by tomorrow for Fabulous Freebie Friday here at Shelly's Images.

We have a wonderful sentiment that goes perfectly with this week's Featured Image.

Our freebie will be available from Friday through Sunday.

Friday, September 23, 2011

Fabulous Freebie Friday!

Hi Everyone!

TGIF!!!

It has been awhile since we offered a Fabulous Freebie Friday so I thought I would share three files that I made for a project for my daughter Taylor's 13th Birthday.

The first file is a sentiment.  This sentiment is great for many projects, but also works perfectly for this Diamond Fold card.  If you would like to know how to make your own Diamond Fold card you can visit our tutorial here.
Sorry....our freebie event is now over.  Thanks to everyone who stopped in and enjoyed our freebie and left us a wonderful comment!
Our second freebie today is the template I used to create the pouch for my daughter's birthday card.  If you use Word be sure to download the file because it is perfectly sized for the dimensions of the diamond fold card and ready to print.  The Word file also contains the frame file.  Again perfectly sized and ready to print.


Here are a few quick tips for using our Pouch Template.

 I always print my items on plain paper before printing on patterned paper.  I folded my trial template on the middle fold just to be sure that my project was going to fit inside easily.  This template is designed to print on an 8 1/2 x 11 inch piece of paper on the landscape setting.
 Now I am ready to print the template on the back side of the paper that I am using for my pouch.
 Cut as many lines as you can using your paper trimmer.  Then scissor cut the other areas.  Now use your scoring tool to score along the 3 dotted lines on the template.
 I folded the pouch inside out and cut both of the notches at the top of my pouch at the same time.  This just ensures that they are a perfect match on my finished pouch.
 I am going to use my frame template to make a cut out in the front of my pouch.  I am using carbon paper to trace the larger outline onto the wrong side of the front panel of my pouch.  Caution!!!  Carbon paper loves to smudge and smear.  I prefer to use the carbon paper that is made for sewers and pattern makers.  It comes in lighter colors and doesn't smear so bad.  I just didn't dig that far in my file today.
This picture shows the pink frame added to the opening.  Remember you are actually using the cut out part as a window so be sure to leave extra space around the pink frame for gluing it inside of your pouch.

Next fold the pouch on the score lines.  Be sure that your flaps don't show through your window after you fold everything.  If they do then just trim them a little.  I like to fold the bottom up, then the side flap and then use adhesive to glue the back panel down.  In other words the flaps are glued inside the back panel.
I used Shelly's Images "Presents" digi for my project.  You can get that project from now through Sunday at 1/2 price.  Don't miss this opportunity to get this wonderful digi at such an amazing price. 

If you enjoyed today's freebies, please thank us by leaving a little note.  We love hearing from our friends.

And remember.  Sharing freebies is not allowed.  But please send all of your friends in to get their own copy of the files we are offering today.