Happy Tutorial Tuesday!
Anytime I'm scheduled for a 'head-poobah' week (are you thinking Flintstones? Can you see Fred in his Furry oversized Poobah hat? =)
Okay, back to the thought - anytime I'm scheduled for a week, I always ask myself, "Self, what would I like to learn today?"
Well, today I have decided to show you how to make this popped up 'dimensional' card.
I LOVE DIMENSION (almost as much as I love BLING!) =)
But TODAY - it's all about DIMENSION!!!
So here we go!
Grab some paper you want to use - as you can see, I picked a few complimentary papers & patterns.
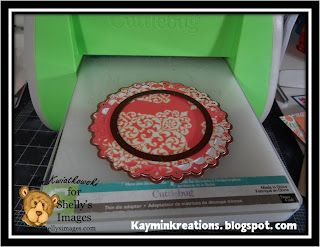
I started by using my Cuttlebug and my Circle Nestie to cut out the image I'm planning to use (the new Bluebirds image)
I'm putting a border around this image that will be dropped below a frame and several layers of paper, so I took two nesties - one for an outside frame and the circle for the center of the frame.
Below is what the frame will look like once it's been cut out.
So, now we'll cut a hole in the base of the card we plan to use - I used my cuttlebug again and the same size circle nestie that I used to cut out my image as well as the center of the frame.
Below I cut through 2 pieces of paper - the Green cardstock base as well as the patterned paper.
Now that the hole is cut below, I'll begin to assemble my card.
I placed the image below this two layer mat on the Kraft base.
This is where we start adding the dimensionals - there are two layers, one layer on the print/green layer as well as the Peach Frame that we cut out earlier.
This is a photo so you can see some of the layers.
After the layers are put together, I added some bling, a sentiment, border and a little ribbon to finish it off!
And VOILA - here's the beauty I ended up with -
I hope you enjoyed this tutorial today - I had so much fun making this one, I can't wait to make another one! =)
Hugs & Happy Days!


Oh Min! What a fabulous project. And I love the dimension and the step by step instruction. ooooh...and do I spot some sewing on this card!?!! Beautiful!
ReplyDeleteWow great tutorial Min, often the explanation is so complicated of doing stuff like this, you did a great job, plain and simple, thanks!
ReplyDeleteI am going to give that a whirl - for my very next card! Thanks Min!
ReplyDeleteLove
Jen L
This is AWESOME Min ... now why didn't I think of that? LOL! Great idea and thanks so much for sharing it!
ReplyDeleteThis tutorial is what happens when you THINK you made an oops! =) HA HA!
ReplyDelete