Hello there!
It's time for another fun Tutorial Tuesday!
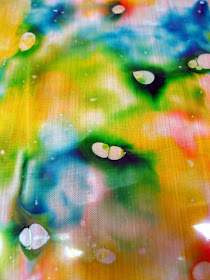
Recently I was in need of making a homemade flower but needed it to be certain colors ... remembering a technique I learned over on SCS a very long time ago called Ink, Spray & Smash ... I put my own twist on it and viola! ... perfectly matched flower for my project.
Let me share with you the finished project, then I'll show you how you can make your very own! The color combinations are endless!
Items you will need are:
* Reinkers
* Spray bottle of water
* Plastic Page Protector (with the 3-hole punch side cut off so you can open it like a book)
* One 8 1/2 x 11 sheet of white cardstock cut in half
* Tim Holtz Tattered Florals Die (you can use any flower die or punch for this technique)
* Glimmer Mist
* Tweezers
To Make Your Designer Paper:
Dribble your choice of Reinker colors on the right side of the opened plastic page protector.
Spray with water till ink starts to bleed.
Close the plastic page protector and gently rub inks together. Not too much ... otherwise your colors will turn to MUD.
Carefully reopen the page protector and with your 2 pieces of paper put together, carefully lay them down on the right side ... close the page protector and gently rub the colors on your paper.
Here is your finished paper ... I hang mine to dry for a few minutes before running it through the die cut machine to make my flowers.
(My flower is a little different color because it was made from a sheet of paper I had already made for another project.)
To make the Flower . . .
Run your dry sheet of dp through your die cut machine to cut your flowers (or use whatever punches you desire).
Here's how they look once punched ... now the fun begins!
While on a protected area, spray your new flower pieces with the Glimmer Mist of your choice. I have used Tattered Angel Pearl.
While still wet from the spray, place your tweezers in the center of the petal then curl both sides of the petal up around your tweezers with your fingers.
This curling methods gives a more natural look to the petals.
On this flower, I have made a small cut at each segment. Which will make it easier to curl without tearing. Of course this too is still wet from the spray making it more pliable.
With your tweezers held again in the center of the petal, curl it around gently ... hold for a moment then release and go on to the next petal until each one is done.
Here are each of your pieces now that they have been pinched, twisted and shaped. Next step is to stack them and make your card or project. You can use anything for the middle embellishment ... a smaller flower, dew drops, pearl, gem ... whatever you desire. I have used a pale blue pearl in the center of mine.
I hope you've enjoyed this tutorial and will give it a try. It looks like a lot of steps but believe me ... it is VERY easy and you will use it over and over again! The nice part is you make TWO pieces of designer paper in the time it takes to make one! You can use one now and save one for a later project.
We would LOVE to see your creation using this technique!! ENJOY!
BEFORE I GO ... I quickly (5 minutes tops!) made another flower using the designer paper I made for this posting. Thought you might like to see it ... here ya go . . .
This is SO MUCH FUN!! Please give it a try and let me know what you think!!
BEFORE I GO ... I quickly (5 minutes tops!) made another flower using the designer paper I made for this posting. Thought you might like to see it ... here ya go . . .
This is SO MUCH FUN!! Please give it a try and let me know what you think!!


Darlene, this looks just beautiful. Thanks for showing step by step how it goes together!
ReplyDeleteDenise
Darlene, wow, beautiful flower technique. I like the finished flower with the yellow flower center, it just pops!
ReplyDeleteAwesome tutorial Darlene! It is really two tutorials in one since you could use the techniques just for making paper, or you could continue to make your beautiful flowers. I can see that I need to go shopping for some flower dies.
ReplyDeleteStunning such a lovely finish.....:) Sandra H
ReplyDeleteWow! They are beautiful. I love the idea of making the paper yourself. Thanks for sharing Darlene!
ReplyDeleteOh my WOW Darlene - this is a fabulous tutorial. I just love the sentiment you used on your beautiful card too. Adding that to my notebook!
ReplyDeleteGreat job!
Hugs & Happy Days!
Great Tutorial Dar!:)
ReplyDeleteMWAH! Scrappy
Fabulous tutorial Darlene, DEFINITELY going to do this one!!
ReplyDelete