
Supplies Needed:
1. cheap-o dollar spot Chalk Ink(s) in whatever color(s) you like
2. makeup wedges
3. your colored image
Optional: scrap paper/cardstock to work on, sm. aerosol can of hairspray, baby wipes (for cleanup!).

Step 1: Gather supplies and cover surface to avoid getting ink all over. FYI: Chalk ink, while beautiful can be tricky and may smear and stain. A spray fixative helps to reduce smearing when you are done sponging. My advice? Use cheap aerosol hairspray! A thin coat sprayed from a foot or so above the image does the trick and is alot cheaper than a can of $6.00 Krylon or 3M!
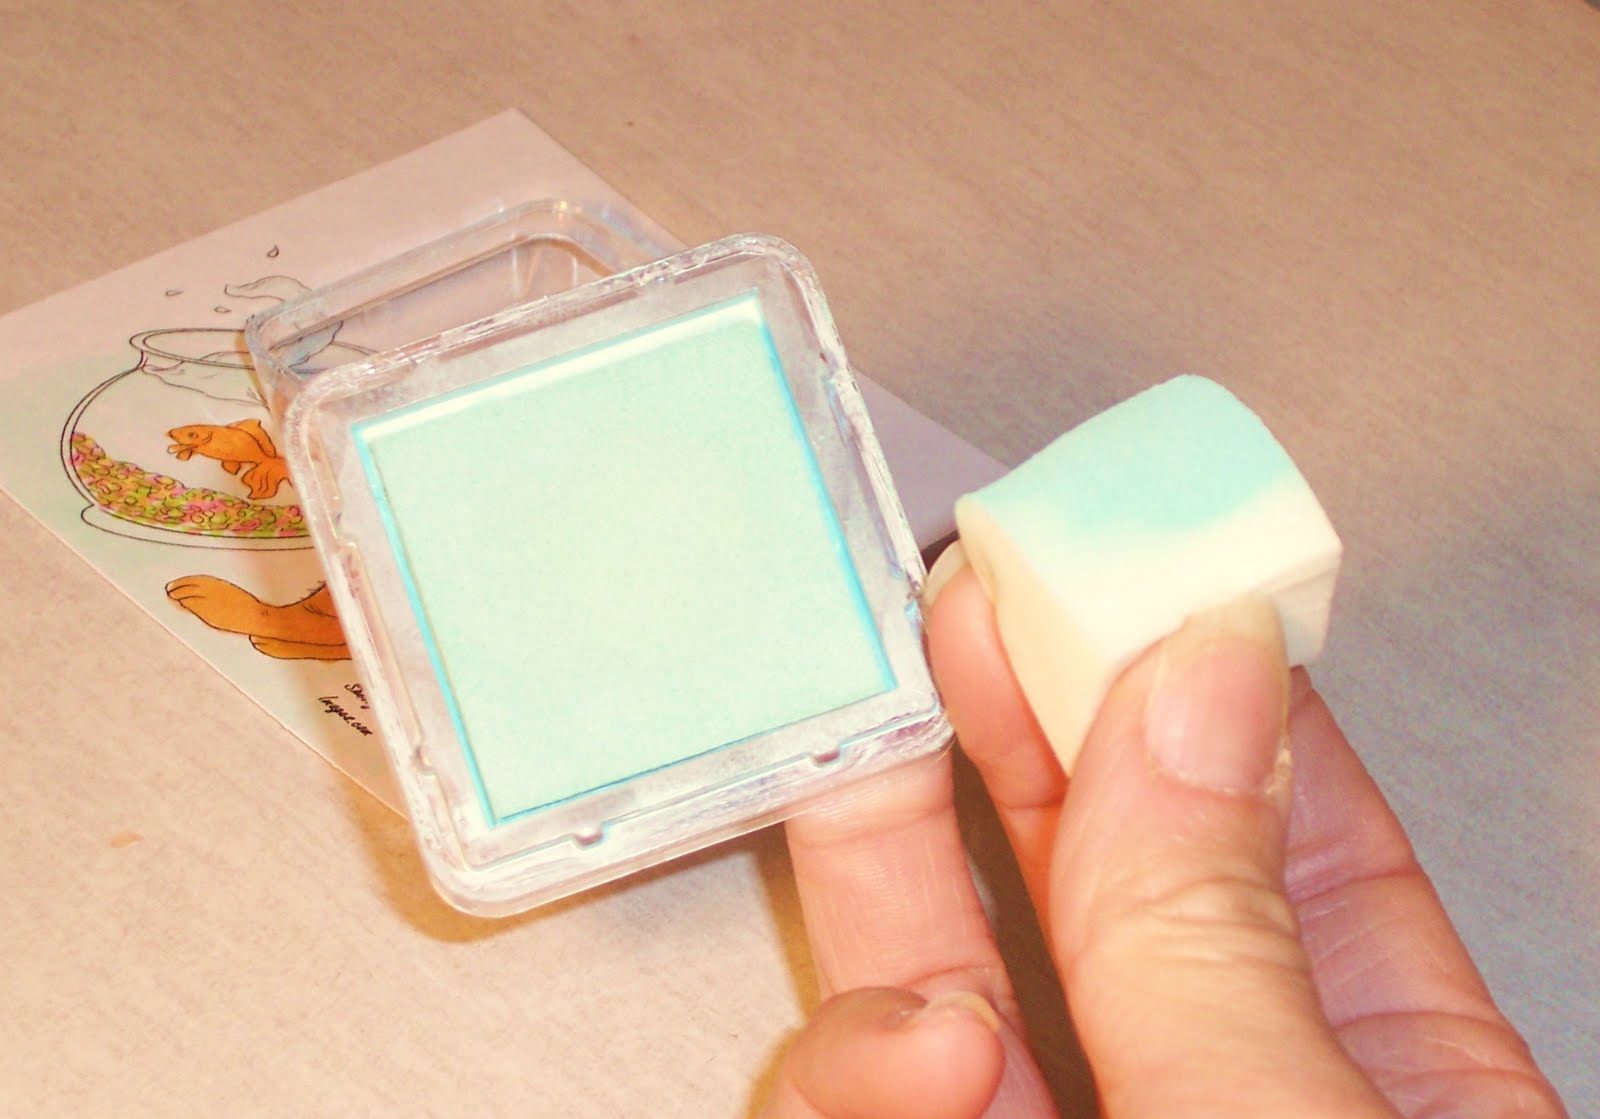
Step 2: Bend makeup wedge slightly and dab it onto ink pad. I like the makeup sponges because they are super cheap, and they hold just enough ink to not create a mess! I also like them, because sometimes you can use the other side for another color on your project! Note: Makeup wedges can be found at pharmacies, beauty stores, and online for about $1. for 32+!
 Step 3: Starting on the outside corners of your colored image, stroke the wedge all around the outside edge. Overlap strokes slightly and lightly continue all around your image. Go over it lightly the first time around, and repeat as desired. You can always add more ink, but once it's there it's there permanently. DO NOT try to brush excess away! It will smear and ruin your image!
  As you can see, the edges will be darker and the chalk will be naturally lighter around your image. This sort of 'Halo Effect' serves to highlight your beautiful coloring! It also may help to hide any coloring imperfections!
 Below is the image with most of the sponging complete! Of course, you'll have to wait and see what I'm making with my gorgeous Shelly's Image! In the meantime, why not try chalking/sponging yourself! You'll quickly see why I LOVE this technique!

I hope you enjoyed my tutorial! :)
Don't forget Thursday's TTT Challenge is still open!
Click HERE to check out the details
Wonderful Tutorial Scrappy!!!! I knew I would find a use for all of those makeup sponges that I have in my cabinet. :)
ReplyDeleteRight there with you Shelly! Hmmm, why didn't I think of that?! :)
ReplyDeleteHugs & Happy Days!
~Min
oh cool. didn't know a hairspray does the trick too. thanks for sharing! :)
ReplyDeleteFab tutorial Scrappy, thank you!
ReplyDeleteSuperb tutorial Scrappy, thanx girl!
ReplyDelete