
Today I want to share one of my favorite holiday projects with you. I made one of these Christmas Shopping Planners for myself a few years ago and I absolutely LOVE it! There are pockets inside of the planner for each member of the family. An insert helps keep track of which gifts I have purchased and which gifts I still need to buy. The reverse side of the insert even has spots for keeping track of the stocking gifts. I add each child's letter to Santa to their pocket so I always have those with me when I am shopping. And I add receipts to the pockets for those dreaded returns. The very best part of a Christmas Shopping Planner like this is that the shopping list is hidden. I can't tell you how many times I have pulled out my paper list only to have my husband clearly read what he is getting for Christmas. With this planner his part of the shopping list is hidden in his own pocket of the planner while I show him the lists for the kids. :)
So...let's get started making our Christmas Shopping Planner.

For this project you will need
....
1 color of cardstock for every pocket that you plan to make. I used Bazzill colors.
Any cardstock you plan to use to decorate the front of your planner. I used Crimson, Leap Frog, and Natural.
2 coordinating Patterned Papers. 1 will be for your covers and the other for an accent on the front of your cover. The red is something from my stash (sorry that I don't know the name). The paper I used for an accent on the front is "Evergreen Christmas Mix" from the Paper Studio.
Ribbons and Fibers for tying the book closed and decorating the wire edges
Bind it All or other items for binding your booklet
Copic Markers or your choice of tools for coloring your image
Image for the front. I used Shelly's Images "Santa"
Adhesive
Bone Folder Tool
Embossing Folder (optional)
Cricut and Tags, Bags, Boxes and More cartridge for cutting pockets or template (link below)
ChristmasShoppingPocket.doc
(If you have Design Studio but don't have the Tags, Bags, Boxes and More cartridge send me an email. I will send you a Design Studio file to cut the pockets)
(If you have Design Studio but don't have the Tags, Bags, Boxes and More cartridge send me an email. I will send you a Design Studio file to cut the pockets)
Document for inserts (links below)
Shopping List Insert
Stickles, Embossing Powder, VersaMark pen, embossing heat gun, and Diamond Dust (optional)
Shopping List Insert
Stickles, Embossing Powder, VersaMark pen, embossing heat gun, and Diamond Dust (optional)
Old Cricut cutting mat or chipboard for front and back cover
Scissors

First cut all of your pockets for your planner. I cut out one for each member of my immediate family and then one "other" pocket. It holds multiple shopping inserts for the Grandmas and Grandpas and other gifts that I need to purchase.

Fold your pocket as shown. Add adhesive to the flaps and fold to close the pocket. (From experience, liquid glue really is the better choice of adhesive for these pockets. It holds better.)

At this stage I would write the names on each pocket. In this picture I am showing the pockets from my personal planner. I didn't put names on the new planner that I made for this tutorial.

Now we need to measure for our cover. If you are using the template or your own Cricut cuts then your pockets might vary slightly. Please measure as shown here. My pockets measure 5 inches from what will be the bound edge to the top of the front of the pocket. We want the "tab" part of pocket to extend past the cover of the book.

My pockets measure 4 3/8 inches from what will be the top to what will be the bottom of our book. So I want my front and back cover to measure 5 x 4 7/8 inches.

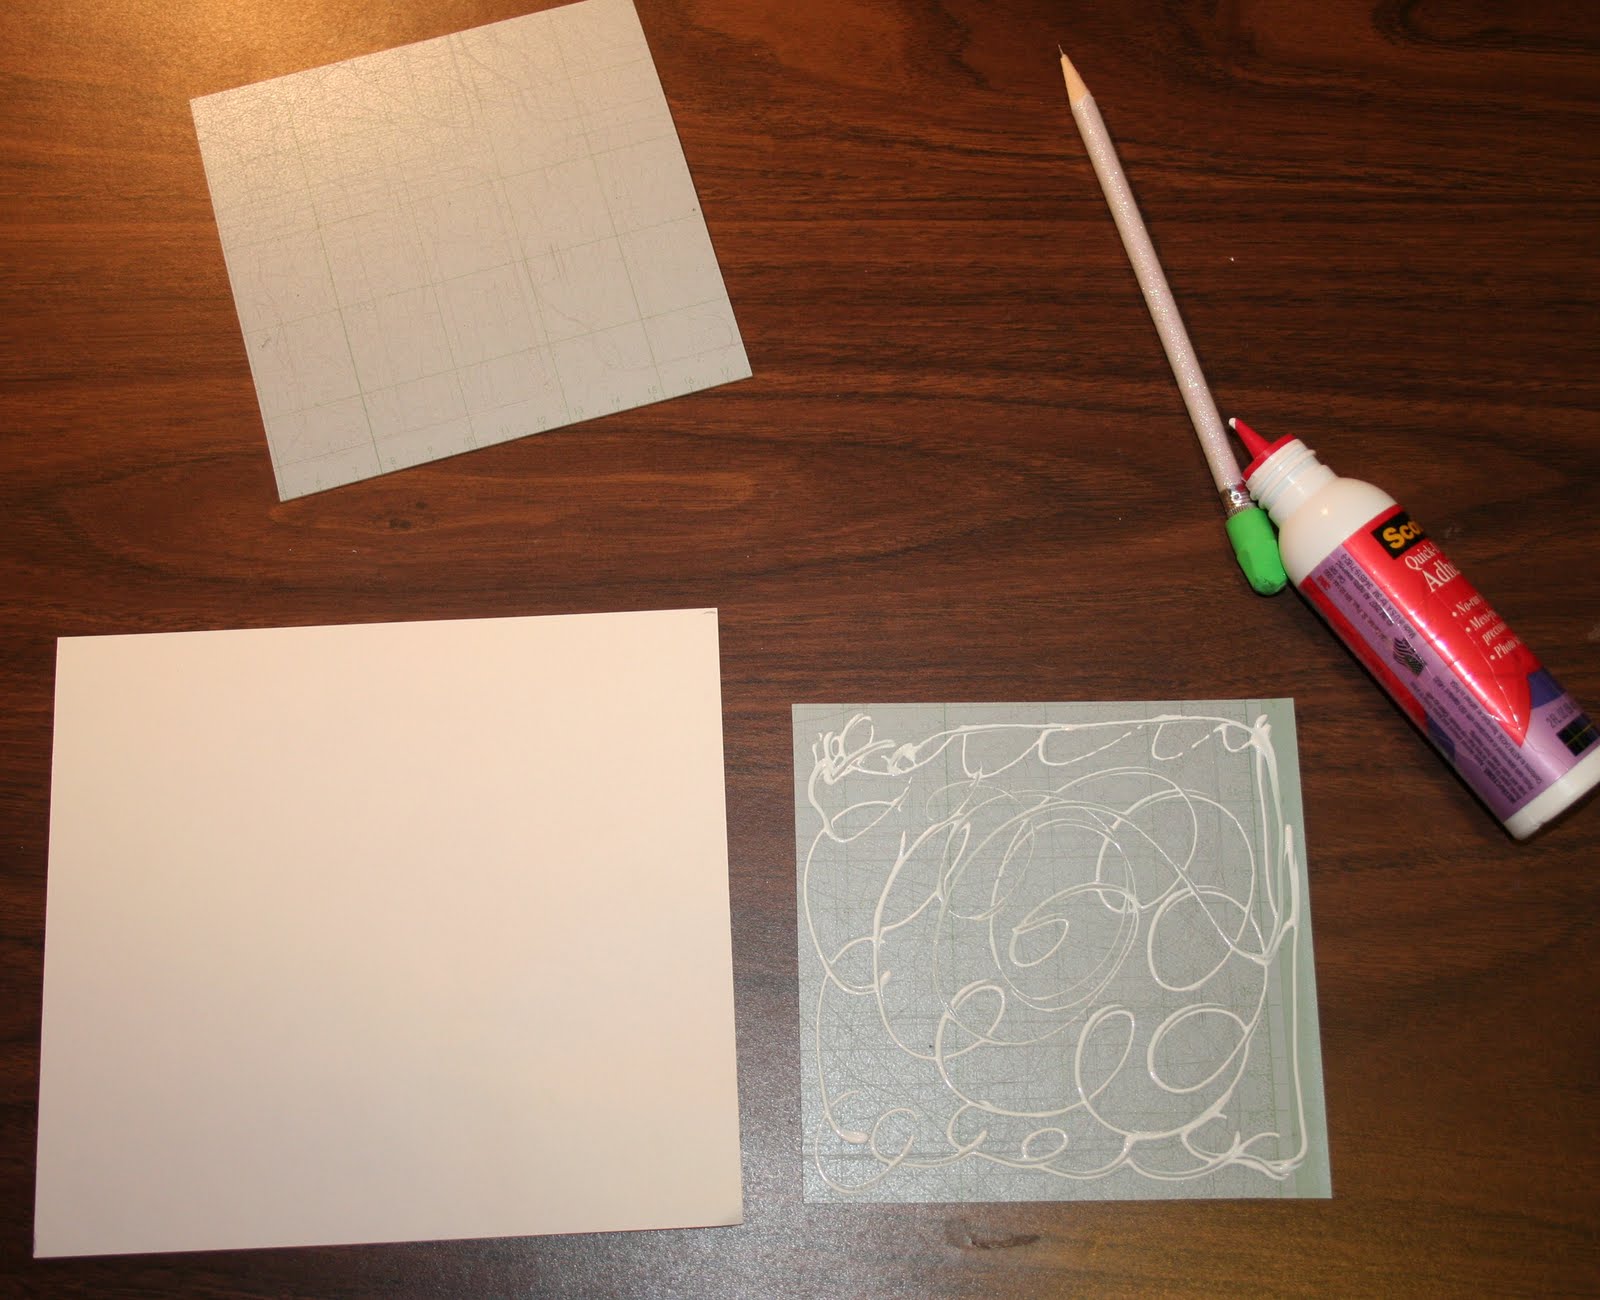
Now we are ready to measure the patterned paper that will wrap our front and back cover. Place your patterned paper wrong side up and place your covers on top of the paper. Measure the patterned paper to be approximately 1/2 inch larger than the covers on each side.

Apply glue to the cover base. Place the cover-glue side down-on the wrong side of the patterned paper. Take time here to really press and rub so that the glue is evenly spread. Turn the cover base and patterned paper and rub on the right side to spread the glue.

Cut the corners of the patterned paper. Make the cuts about 1/16th of an inch from the corner of the cover.


 Once the ribbon is glued down it is time to glue down the solid cardstock on the inside of the back cover.


Now fold the paper over the edge of the cover base on all sides. This will make gluing easier. Add glue to the patterned paper edges and fold over the edge of the cover base. Repeat so that both the front and back cover are wrapped with patterned paper. *Tip* Corners not matching perfectly? No problem. Just glue the corners that you cut off onto the corners of the cover base. Now when you fold the flaps over you can't see where the corners don't match perfectly.
Now measure a piece of coordinating solid colored cardstock. Since my covers are 5 by 4 7/8 inches my cardstock for the inside of each cover will measure 4 1/2 by 4 3/8 inches.


Glue one piece of cardstock to what will be the inside of the front cover. Before gluing the inside of the back cover you need to attach the ribbon that will be used to tie your planner closed. My ribbon measures 29 inches long. I glued my ribbon about 3/8 inch from the right side of the back cover.
 Once the ribbon is glued down it is time to glue down the solid cardstock on the inside of the back cover.
Now you are ready to decorate the front cover of your planner. Keep in mind where your binding will be and where your ribbon will be. I used the Versamark pen to emboss the jingle bell and the glasses on Santa. I also used Diamond Dust to give a little "snow" to Santa's hat.
Use the Bind it All to punch holes in your front and back cover. You can also punch holes in your covers and just tie with a ribbon. Another option would be using large rings.
 Once your covers are punched it is time to punch your pocket inserts.
 Use the Bind it All machine to crimp the wires around your book. Take care before crimping the wires that your book is put together correctly and that the pockets are all facing the right direction. (Yep...the voice of experience talking again) I used 7/8 inch wires to close my planner.
 Print the inserts for your pockets. Feel free to add names to the tops of each of your inserts. In my book I print the Stocking gifts on the reverse side of the gift list. You can alter your inserts in any way that works best for you.
 Now cut ribbons and fibers to decorate the wires of your planner. In my opinion various sizes and colors really look great. And I love the look of the fibers. Just don't choose any ribbon that is too wide.
  There you go. A finished Christmas Shopping Planner that will be quite a conversation piece with your friends and store clerks. And of course you can vary this project for other booklets and planners.
Do you want to win this planner? Just respond to this post and we will choose a random winner to receive this beautiful Christmas Shopping Planner. Be sure to check back on December 13th to see who all of our winners are.

This does seem like a great idea. I would use it for the year's birthdays etc. That would be very organised.
ReplyDeleteWonerful project, Shelly! This could be used all year long! I love this idea!
ReplyDeleteWhat a stunning project !! I love the idea of having it all together, but most of all, having a handmade item is so much more special !! Would be a stunning gift, thanks for showing us how !! lotsa luv Theresa
ReplyDeleteWhat a fabulous project.....I would use this all year long for a birthday list reminder. Make a little pull out tag for each month with a list of the birthday's for that month.
ReplyDeleteWhat a great tutorial.....thank you!!!
What a wonderful project Shelly, thank you so much
ReplyDeleteHow cool is this! Love it! Great tutorial, hope I can make one with my supplies. Or win it, even better!!!
ReplyDeleteI just love this Shelly!! Fabulous tutorial too!
ReplyDeleteWhat a fabulous idea. So cute! Thanks for sharing this great tutorial.
ReplyDeletewonderful project, just wish I had the toys that you used to make it with. will find a way to use your instructions the old fashioned way. lol catbaskets@mchsi.com
ReplyDeleteWhen I first saw your freebie sentiment this is what I thought of. But your planner is a lot nicer than what I had envisioned. Wonderful job!
ReplyDeleteJust love this Christmas Planner Shelly as it can be used for all sorts of things not just Christmas. It looks gorgeous. - Pauline L
ReplyDeletethis is gorgeous and such a great idea!
ReplyDeleteI love this planner idea. And you could even adapt it to each month for birthdays/anniversaries etc. I really need to try to make this one! Thanks for a great tutorial Shelly:)
ReplyDeleteWow! Shelly, this is *SO* cool! Great tutorial! :)
ReplyDeleteOh wow Shelly I love this idea. Such a nice way to keep everything organized. Great tutorial. Now I have a question----how do I keep this tutorial so I will be able to make some later?
ReplyDeleteOOPPS forgot to say thank you for sharing your tutorial.
ReplyDeleteHi Phyllis....all you need to do is come back to the blog and look at the labels on the side of the blog. They are found right under our followers at the right. Click on 12 Days of Christmas and you will be able to see all of the posts for this event
ReplyDeleteThanks for all of the nice posts about the tutorial. Our random winner is Brook. Brook please email me your address so I can send your planner off to you. You can email me at shelly@shellysimages.com.
ReplyDelete